

Introduction #
I believe many people have heard the “cat call” from the “ancient times” of dial-up connections. Back then, people were still using telephone lines to connect to the internet, with speeds up to only 57.6Kbps. The phrase “too many pictures kill the cat” also originated from that period.
Recently, while surfing the internet, I saw some content creators on Bilibili using telephone switches and physical modems to enable dial-up internet on Windows 11, even achieving interconnection between two machines and super terminal functionality. I was wondering if it was possible to simulate these functions using software alone, without physical hardware, to achieve interconnection and dial-up internet?
I indeed found such an open-source software: atduck
Atduck simulates a Hayes-compatible modem.
Deploying atduck #
In 2019, there was a blog post that detailed the steps for using atduck for dial-up internet.
ATduck itself is easy to install, but it relies on the Perl IO-Pty module and the Slirp software. Slirp can simulate a SLIP or PPP protocol server on a TTY, while ATduck only implements the modem part, leaving the networking part to Slirp.
However, for obvious reasons, Slirp is rarely used now. It is not available in the Arch Linux software repository, not even in AUR. According to the Slirp page on Wikipedia, part of Slirp’s maintenance is handled by Debian maintainers.
Here is the Dockerfile he used:
RUN PKG_INSTALL(git slirp perl libio-pty-perl tini) \
    && git clone https://github.com/nandhp/atduck.git \
    && ln -sf /usr/bin/slirp /atduck/slirp-nandhp-patch \
    && PKG_UNINSTALL(git) \
    && FINAL_CLEANUP()
WORKDIR /atduck
ENTRYPOINT ["tini", "/atduck/atduck", "--", "-l", "0.0.0.0:5555"]
Or you can directly use his image: xddxdd/atduck
If you are using VirtualBox, you can directly follow the blog instructions to add a serial port and use it.
However, for VMware virtual machines, this Dockerfile cannot be used: on one hand, it specifies that atduck listens on a TCP port, while VMware only supports Unix Socket communication for serial ports. So we need to make a slight modification:
Method 1: Directly modify the existing image startup command
FROM xddxdd/atduck
ENTRYPOINT ["tini","/atduck/atduck","--","-l","/tmp/modem"]
Method 2: Directly change the ENTRYPOINT in the DockerFile to ENTRYPOINT ["tini","/atduck/atduck","--","-l","/tmp/modem"].
RUN PKG_INSTALL(git slirp perl libio-pty-perl tini) \
    && git clone https://github.com/nandhp/atduck.git \
    && ln -sf /usr/bin/slirp /atduck/slirp-nandhp-patch \
    && PKG_UNINSTALL(git) \
    && FINAL_CLEANUP()
WORKDIR /atduck
ENTRYPOINT ["tini","/atduck/atduck","--","-l","/tmp/modem"]
Then compile and run.
docker build -t atduck1 . You can also use docker compose directly:
services:
  atduck:
    image: atduck1 # Change to your compiled image name
    container_name: atduck
    restart: always
    volumes:
      - /tmp:/tmp # If you are using Unix Socket as shown, add this. Otherwise, as shown in the original blog, just add port listening.
Achieving Dial-Up Internet #
We are using VMware here.
According to the ENTRYPOINT directive in the previous section, we created a Unix Socket at the /tmp/modem location.
However, first, we need to set its permissions, and this needs to be set every time atduck docker starts; otherwise, VMware, as a normal user, cannot read and write this Socket and will report insufficient permissions.
Note! If you are not starting the atduck container for the first time, please be sure to delete /tmp/modem before starting; otherwise, there may be listening issues.
sudo rm /tmp/modem # These two commands must be executed after starting the container, username is your username
sudo chown username /tmp/modem
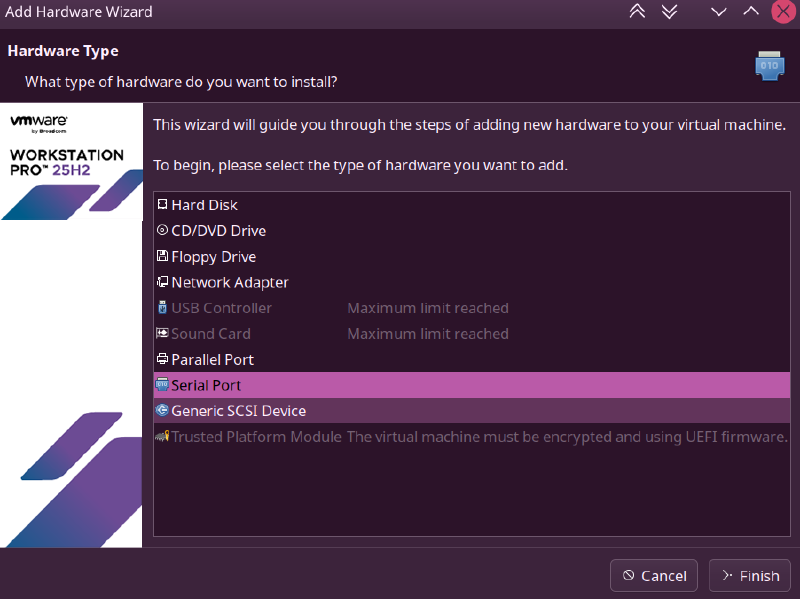
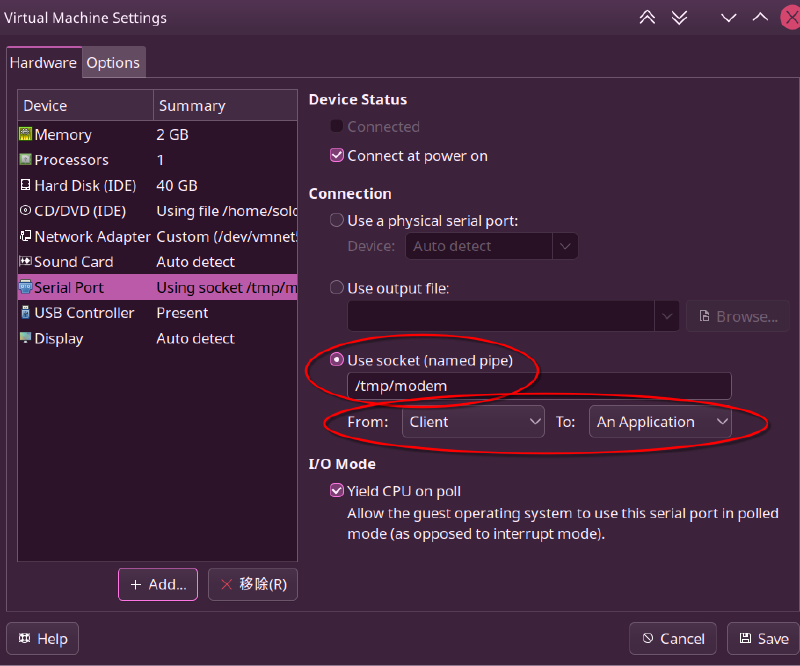
sudo chgrp username /tmp/modemThen, in the virtual machine settings where we need to dial up to the internet, add a serial port device:
Set it as shown in the image, choose to use socket (named pipe), and set From Client to An Application.
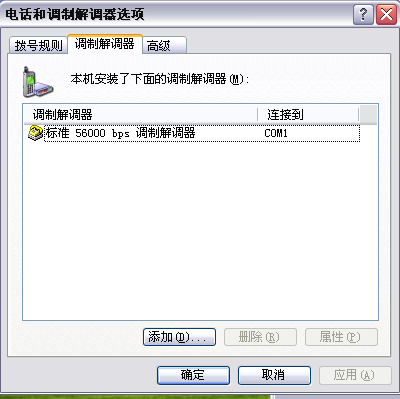
Start the virtual machine, and in “Control Panel -> Printers and Other Hardware -> Phone and Modem Options”, install the modem (you can directly install the standard 56000bps modem under Windows XP, while under Windows 2000, you need to install the Hayes modem).
Add a new dial-up connection using the new connection wizard:
- Choose to connect to the Internet
- Choose to manually set up my connection
- Choose to connect using a dial-up modem
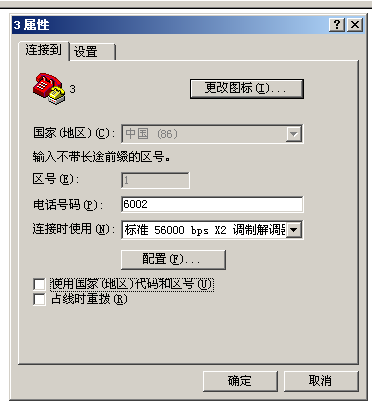
- Enter a connection name, any name will do, this name is your connection name
- Enter the phone number: 5555 refer to here
- Leave username and password blank, no need to enter
- You can choose to add a shortcut
Then it is created, and you can connect to enjoy surfing the internet!

What Phone Number to Choose? #
According to the atduck usage instructions DIALING PLAN:
The following dialing plan is configured by default.
5550 Connect to a shell on the host
5555 SLiRP (PPP mode)
5556 SLiRP (SLIP mode)
6xxx Call another emulated modem by serial number. For example, dialing 6006 will connect you to the modem with serial number 6. To determine your modem’s serial number use AT+GSN. Note that serial numbers are not fixed between sessions.
We can see that to achieve dial-up internet, the virtual machine needs to dial 5555 or 5556, we choose the PPP mode used by Windows by default, which is 5555.
Achieving Interconnection Between Two Machines #
Since the dial-up connection is successful, we naturally need to experience the joy of sending “large files” while chatting with friends.
We need to use the super terminal, which is available in the original images from Windows 3.1 to Windows XP, usually found in Accessories - Communications.
We use a Windows 2000 virtual machine to interconnect with our Windows XP.
We need to let one atduck instance listen on two Unix Sockets simultaneously, and we can modify the ENTRYPOINT as follows:
ENTRYPOINT ["tini","/atduck/atduck","--","-l","/tmp/modem","-l","/tmp/modem2k"]/tmp/modem2k is the Socket that our Windows 2000 virtual machine will use.
Open a new terminal, still handle the permission issues as we mentioned above.
Open the Windows 2000 virtual machine and install the modem.
According to what phone number to choose:
6xxx Call another emulated modem by serial number. For example, dialing 6006 will connect you to the modem with serial number 6. To determine your modem’s serial number use AT+GSN. Note that serial numbers are not fixed between sessions.
We know that to achieve interconnection between two machines, we need to dial 6xxx. So how much should we dial?
We need to use putty for direct serial communication, download putty version 0.61, which can run on Windows 2000 and Windows XP.
Open putty, select Serial connection to COM1
Click connect and enter AT+GSN:
If you use docker logs -f atduck, you can see the AT command logs of atduck, allowing you to view your interactions in real-time.
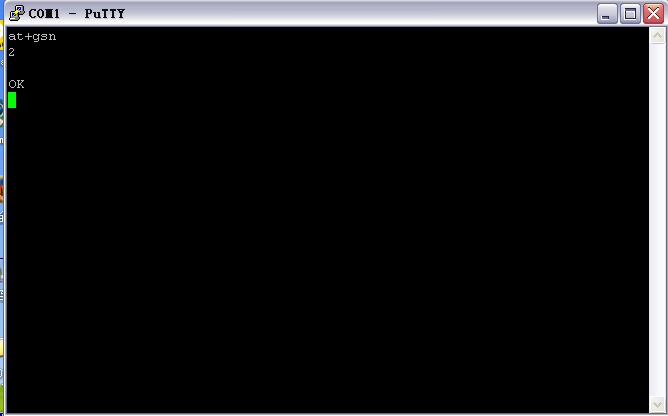
Seeing the reply 2 in the image indicates that the phone number of this computer is 6002.
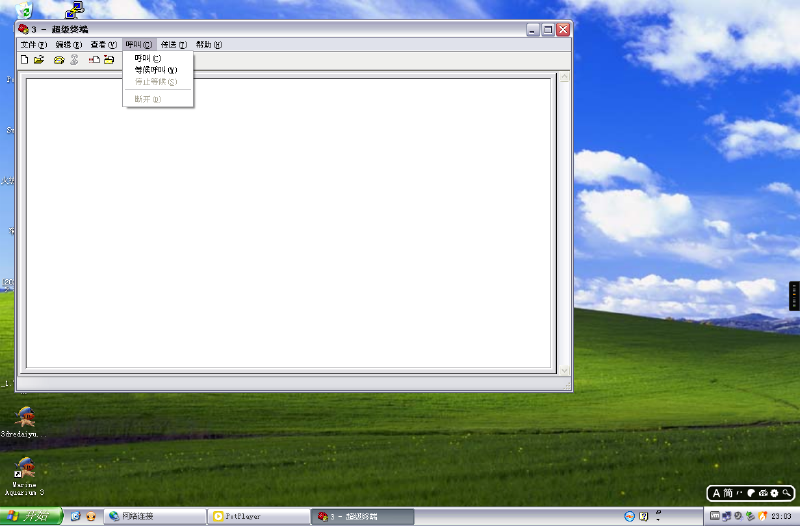
We open the super terminal and wait for the call:
Open Windows 2000 and dial 6002, be careful not to include the area code:
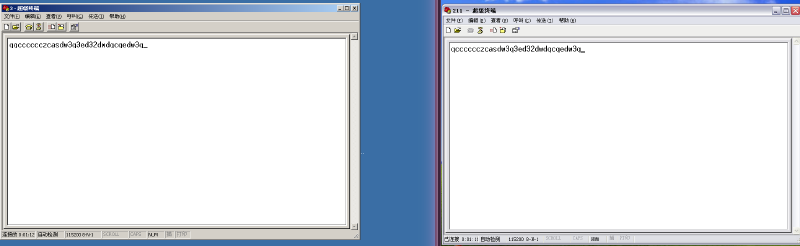
Then… it connected!
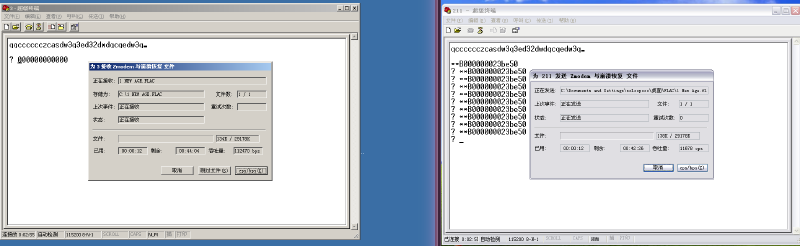
Send a “large file” using the transfer function:
Conclusion #
This program can do more things, but I haven’t tried much, so I can only write this much.